
In Stock
Share
Show All
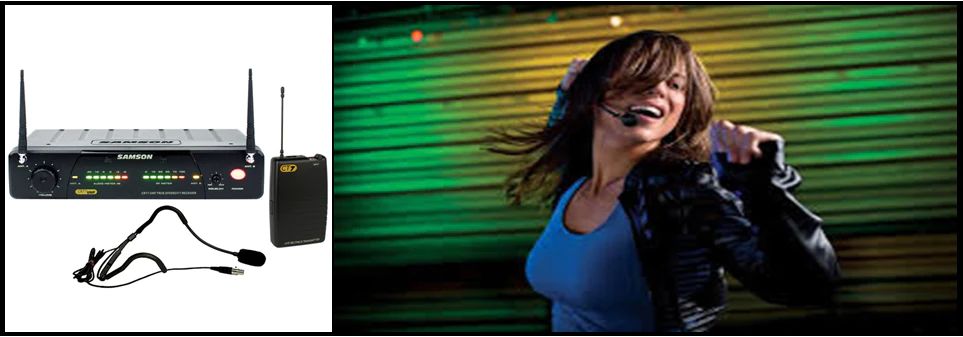
SAMSON CR77 HEADSET WIRELESS MICROPHONE


AudioVisual & FX
St Kilda, VIC, Australia
Day
$77
Week
$385
Month
$1,155
Bond
$100
Delivery unavailable
Customer collect only
Description:
1. Make sure that the supplied receiver and AH1 transmitter are factory preset to the same channel.
2. Physically place the receiver where it will be used and extend its antenna(s) vertically.
3. Set the power switch on your UH1 transmitter to the “off” position (away from the arrow) and place a fresh battery in it. Then turn the transmitter back on momentarily; its LED will flash once and then go off if the battery is sufficiently strong. Once battery strength is verified, turn the transmitter off again.
4. If you are using an AH1 headset microphone, position it correctly as per the illustrations on page 12. If you are using an AirLine UHF Wind Instrument System, clamp the horn mic to your instrument as described in the supplied HM40 owners manual.
5. Turn your audio system off and make the physical cable connection between the receiver’s balanced or unbalanced output jack (if necessary, both can be used simultaneously) and a mic level audio input of your amplifier or mixer. If your system contains a CR77 or UM1 receiver, be sure to set its Audio Output Level switch correctly.
6. Turn the Volume, Level or AF Level knob on the receiver completely counterclockwise. Connect the supplied AC adapter to the receiver and plug it in (or place a fresh battery in the UM1 receiver), but leave its power off for the moment.
7. Turn on the receiver. If your system contains a CR77 receiver, its “Power” LED will light steadily red. (Note: the UM1 receiver has no such LED.)
8. Turn on your AH1 transmitter. If your system contains an AR1 receiver, its “Power/ RF” LED should change color from red to green, indicating that it is receiving valid RF signal and is placed and positioned correctly. If your system contains either a CR77 or UM1 receiver, one of the “A/B Receiver” LEDs will be lit, showing you whether the (left)“A” or (right)“B” receiver is currently being used. The CR77 / UM1 meter will also indicate the strength of the incoming RF signal.
9. Turn on your connected amplifier and/or mixer but keep its volume all the way down. Make sure the AH1 transmitter is unmuted. Set the Volume, Level or AF Level knob on the receiver fully clockwise; this is unity gain.
10. Speak or sing into your headset microphone (or play the instrument connected to the horn microphone) at a normal performance level while slowly raising the audio input control of your amplifier or mixer until the desired level is reached.
11. Do a walkaround through the intended area of coverage while observing the receiver’s “Power/RF” LED or RF Meter; it should indicate sufficient RF reception in all areas of coverage. Reposition it (or its antenna) as necessary. If extended range coverage is required, a Samson CR77 or UM1 true diversity receiver (set to the same channel as the transmitter) should be used
12. If you hear any spurious noise from the receiver output when the transmitter is turned off, use the supplied plastic screwdriver to adjust the receiver Squelch level control, slowly turning it clockwise to the point at which the noise disappears.
Note: images & descriptions for illustration purposes only (the final delivered product may vary from that shown or described)
Location:


AudioVisual & FX
St Kilda, VIC, Australia
St Kilda, VIC, 3182